In our last DevLog edition for #MyCardSorter, I detailed how I refined my initial prototype and fine-tuned it to sort over 10,000 cards using OCR. This successful phase truly motivated me to embark on the next stage of my project: exploring 3D printing for the upcoming iteration. In this new post, I'll share my initial steps in modeling the next prototype, printing parts, and introduce the 3D printer I acquired.
Image

For years, I've been intrigued by the idea of starting a new hobby with 3D printing, but various factors held me back until last year. I lacked a project to work on, had no experience in 3D modeling, and felt unsure about my design skills. However, as a quick learner, I realized that I didn't need to become a master artist to achieve good results with #MyCardSorter.
Why choose 3D printing?
As discussed in my previous blog posts, the vision of this project is to create a machine using affordable components wherever possible. While 3D printing itself isn't initially inexpensive, it offers a swift starting point, and with smart design choices, overall project costs can be managed. I've embraced a modular-first approach to enable flexibility and cost-effective part replacements. However, the greatest allure of 3D printing lies in its limitless potential for design and tinkering
Choosing the right 3D printer
Today, 3D printing is incredibly convenient. Gone are the days when owning a 3D printer required significant investment of money, time, and energy. Numerous budget-friendly printers now offer features like auto-leveling and user-friendly interfaces.
After an extensive research I purchased the Neptune 3 Pro. It was affordable (around 300€ at the time of purchase) and was ready to go after a quick assembly. If course I could have purchased a more renowed printer like a BambuLab P1 but I did not want to invest a lot of money in a new hobby I had no experience with.
Initial challenges in 3D printing
If you're unfamiliar with the challenges of 3D printing and how it works, allow me to provide a simplified explanation: A 3D printer is a machine that uses a heated nozzle to extrude threads of filament (e.g., PLA or PETG) onto a heated metal bed. This process occurs as the printer head and/or bed moves along the X, Y, and Z-axes. Proper bed leveling and adhesion ensure the material sticks to the bed, where it cools and solidifies.
"A software called a 'slicer' translates 3D models from various files, usually a .stl file, into a format called G-code. This code essentially instructs the printer on where to move and sets other printer-specific settings. The slicer also optimizes the model based on specific settings to improve print quality. One critical function is calculating support structures for overhangs in a model, allowing various shapes to be printed. Supports are thin structures attached to the original model, enabling the 3D printer to consistently print complex designs. Since the printer head cannot print 'in the air,' supports are often necessary.
Possible designs
In the previous version of the project, cards were sorted into two groups: cheap bulk cards and more expensive ones. While this was a good start, I realized it wouldn't meet the needs of a avid card collector like myself. Personally, I sort cards by edition, color, rarity, and alphabetical order, which is no easy task and requires more than just two boxes.
"I had a few ideas in mind to solve this problem. How about having cards spin in a circle and drop into buckets? It could be done, but it comes with many more moving parts and challenges. Other commercial solutions (as discussed in my first post) use interesting methods like vacuum-sucking cups or conveyor belts to move cards and drop them into containers. I experimented with these approaches but quickly decided to skip them because they were too complex to start with.
"Instead of pursuing numerous design solutions, I took a step back and revisited my LEGO prototype. What were the key components that made it work initially? I had a box with cards that were moved forward, card by card, using a servo motor wheel. On another platform, an image of the card was taken, and some software magic recognized the card and moved it into one of two boxes. I decided to re-imagine this concept and enhance the design along the way.
Getting started with Blender
I opted for Blender as the 3D modeling software for the project due to its open-source nature, widespread support, and vibrant community. While the interface is not the most intuitive or beginner-friendly, I dove right in. Instead of tackling complex structures initially, I began by adding cube meshes and resizing them to closely match the original design. This process was exhilarating, as I learned a great deal and could already visualize my initial vision coming to life before printing the first parts. However, my excitement waned quickly as I underestimated the complexity involved in designing parts for printing.
Just because I had a platform with pillars and walls designed in Blender didn't mean I could print it exactly as it appeared in the software. If I wanted the model to be modular, allowing for separate printing of individual components rather than a single print job, I had to carefully consider how to join and connect all the parts securely. Additionally, the original model relied heavily on rubber bands and improvisation to function, which wouldn't be a viable option for this version.

Getting stuck
Image
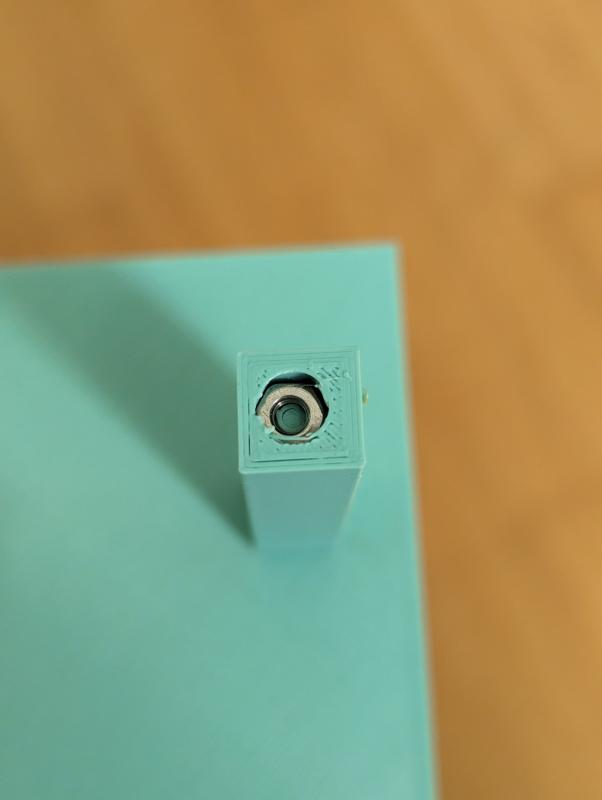
Initially, I attempted to use screws and nuts to connect most of the parts. I downloaded models for M3 screws and nuts and adjusted them accordingly. In my slicer software, I added a filament change command, creating a pause in the print process that allowed me to insert a nut into a matching empty space in the pillars. This method showed promise, but it placed a significant strain on the parts during assembly, leading to structural integrity issues. I realized that repeated assembly and disassembly would likely cause serious damage to the machine.
At that point, it felt like a significant setback, and I grew somewhat frustrated. However, I knew I needed to find an easier way to join parts to bring my vision to life. I already had some ideas for redesigning the structure to be more robust and user-friendly, but I'll delve into those in the next blog post.
I already had some ideas for changing the design to a more robust and easy to assemble and disassemble but this will be part of the next blog post.
Image
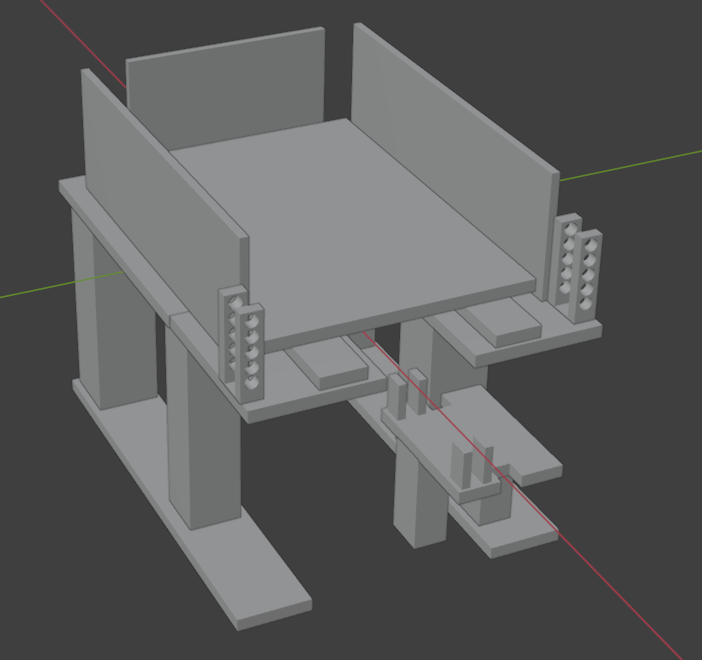
In the image above, you can see part of the first iteration I attempted to create. This was a modification of the model I had already built, but with some adjustments. My goal was to develop a more robust mechanism to ensure that only one card moved forward at a time. You'll notice the small rectangles with holes inside; these will be used in conjunction with larger rectangles that cover the entire width and can be secured into the slots.
Looking ahead, in the next Devlog, I will unveil a significantly improved vision of the machine. Despite the initial struggles, which were anticipated, I had insightful discussions with friends and leveraged their input to propel my design forward. While preserving some of the original concepts, the new design is much more detailed while remaining true to the core principles.
Great project! Keep it up!…
Great project! Keep it up!
Is the source code available somewhere?